
Installing IRIS 3DView
It is not necessary for IRIS software to be installed on the system to use 3DView.
If you chose to have the IRIS software on the same system, it is recommended that you install the IRIS software before installing the IRIS 3D View.
IRIS 3DView software is a separately licensed software package that renders 3D visualizations of IRIS format radar data.
You can install the IRIS 3DView either on an IRIS Analysis machine, or a machine without IRIS.
-
Obtain the following RPMs:
- libogg-devel-1.1.4-2.1.el6.i686.rpm
- libtheora-devel-1.1.0-2.el6.i686.rpm
- qtwebkit-2.1.1-1.el6.i686.rpm
- qt-mobility-1.1.3-2.el6.i686.rpm
- gl2ps-1.3.5-1.el6.i686.rpm
- gl2ps-devel-1.3.5-1.el6.i686.rpm
- compat-expat1-1.95.8-8.el6.i686.rpm
- expat-2.0.1-9.1.el6.i686.rpm
- expat-devel-2.0.1-9.1.el6.i686.rpm
- xorg-x11-apps-7.4-10.el6.i686.rpm
- xorg-x11-server-common.1.7.7-29.el6.i686.rpm
- xorg-x11-server-Xvfb-1.7.7-29.el6.i686.rpm
- vtk-5.8.0-6.el6.i686.rpm
- vtk-devel-5.8.0-6.el6.i686.rpm
- vtk-java-5.8.0-6.el6.i686.rpm
- vtk-python-5.8.0-6.el6.i686.rpm
- vtk-qt-5.8.0-6.el6.i686.rpm
- vtk-tcl-5.8.0-6.el6.i686.rpm
- acroread-9.4.0-1.el6.i686.rpm
- acroread-plugin-9.4.0-1.el6.i686.rpm
-
Install the RPMs in the following order:
#rpm -Uvh
                libogg-devel-1.1.4-2.1.el6.i686.rpm
#rpm -Uvh libtheora-devel-1.1.0-2.el6.i686.rpm#rpm -Uvh qtwebkit-2.1.1-1.el6.i686.rpm#rpm -Uvh qt-mobility-1.1.3-2.el6.i686.rpm#rpm -Uvh gl2ps-1.3*#rpm -Uvh compat-expat1-1.95.8-8.el6.i686.rpm#rpm -Uvh expat-2*#rpm -Uvh xorg-x11*#rpm -Uvh vtk*#rpm -Uvh acroread-9*
- Log in as root.
-
The IRIS 3D View application is in the rpm package called iris3dview-
1.0.2-1.i686.rpm. Install it using the rpm installation tool
# rpm -Uvh iris3dview-1.0.2-1.i686.rpm
It is recommended that you do not run the IRIS 3D View application while logged in as a root user.
If you have IRIS software installed on your system, log in as radarop user.
If IRIS software is not installed, create a user on your system.
- In the GNOME window, create a user by selecting and follow the online instructions.
-
Log in as normal user and check .config/Vaisala directory for the
following files:
- IRIS3D.conf
- IRIS3DColors.conf
- IRIS3DLandmarks.conf
- IRIS3DVisStyles.conf
-
Do one of the following:
-
Run IRIS 3DView visualization:
/usr/bin/iris3dview &When you first start IRIS 3DView, it runs a license wizard. Follow the online instructions.
-
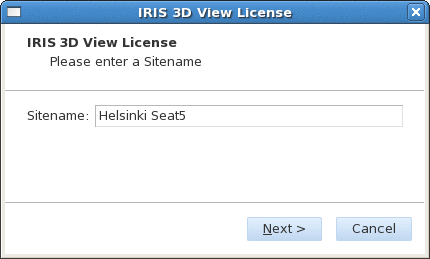
If your system has an IRIS or RDA system already installed, the IRIS 3D View
License dialog box displays the Sitename for your
system.
In that case, leave it unchanged.
If not, enter a unique Sitename (16 characters or less) and select Next.
The IRIS 3D View License dialog displays the site code and check code.
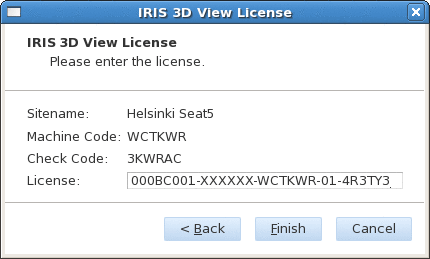
- Send the information shown in previous figure to Vaisala and request a license string.
- Enter the license string in the License field and click Finish.
-
Once the IRIS 3D View window opens, click the setup icon in the
upper right hand corner to open the Settings Window dialog
box.
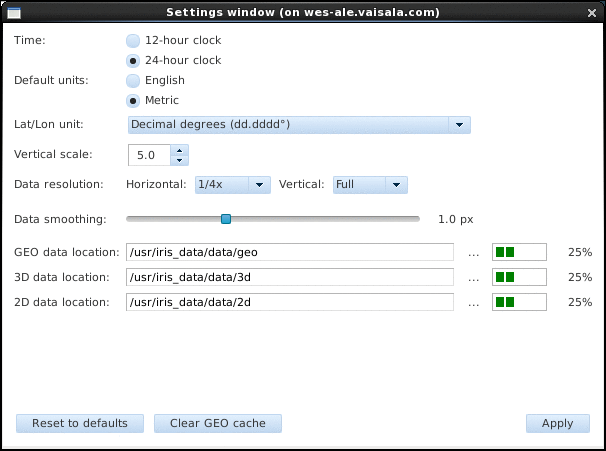
Configure the data directory to point to the directories created earlier, according to your data type.
-
Configure background processing.
Background processing is run by the
iris3duser; however, the user who runs theiris3dvisualization must copy the configuration files to the .config directory of theiris3duser:-
From the export window, select the Background output tab and
follow the online instructions to finish the setup.
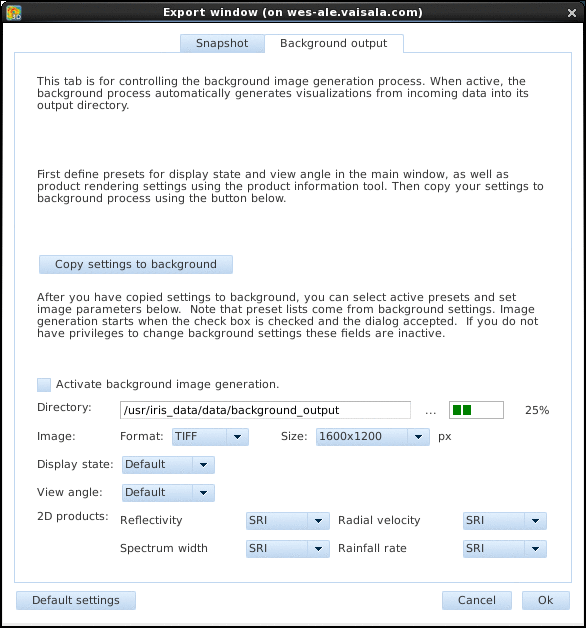
After installing the IRIS 3D View, the background processing daemon starts automatically.
-
From the export window, select the Background output tab and
follow the online instructions to finish the setup.
-
Check the daemon by running the
ps -efcommand:ps -ef | grep irisand you should get the printout similar to:
iris3d   3432    1  0 13:24 ?      00:00:00 dbus -launch -- autolaunch 841d3b9bca80c846219d29fc00000022 --binary-syntax --close- stderr
iris3d   3433    1  0 13:24 ?      00:00:00 /bin/ dbus - daemon --fork --print- pid 5 --print-address 7 --session
iris3d   3435    1  0 13:24 ?      00:00:00 /usr/bin/ iris3dviewd -- loglevel =2 --daemon
If you need to restart the daemon, change to the root user by typing:
su rootYou are prompted for the password.
Stop and start the daemon by typing the following:
#/sbin/service iris3dviewd stop #/sbin/service iris3dviewd start -
Test background processing:
- Copy 3D data to the 3D directory that you configured.
- Wait for a second and check the output file in output directory that you configured.
-
If needed, modify the logging level.
- To check the logging, go to /home/iris3d/ and open the iris3dviewd.log file.
-
To view real-time logging messages while you are running background processing, run
tail -f iris3dviewd.log. -
To set logging level to more details, like level 6, editing the
/etc/sysconfig/iris3dviewd and change
loglevel=2toOPTIONS="-- loglevel=6 --daemon". - Restart the processing daemon.