
Installing AlmaLinux automatically
The automated installation uses KICKSTART to run an unattended installation.
The instructions in this section are for the Vaisala-provided server. If you are using a different system, consult your systems manual for instructions.
- Power up the system by pressing the power button on the server.
- Insert the USB drive into the USB port. If you are using the USB port for the first time, this also enables the port.
-
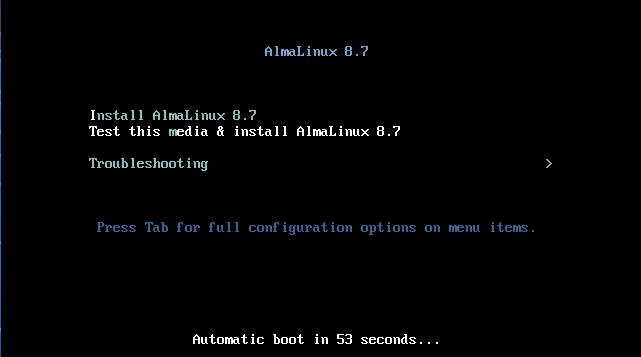
In the AlmaLinux 8.7 window, select Test this media & install AlmaLinux
8.7, and press ENTER.
-
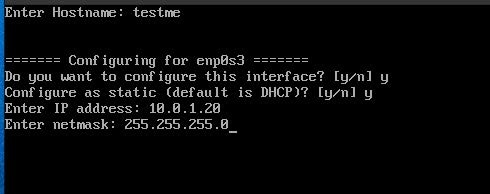
The installation starts. When prompted, configure the hostname and IP address.
- For one port, configure the internal network: Select Configure as static (default is DHCP)?: Y, and enter the IP address 10.0.2.1.
- Configure a second port as DHCP by selecting Configure as static (default is DHCP)?: N.
Then the installation will continue.
- When the installation is complete, the system will reboot automatically.
-
Login as root.
The default password is xxxxxxxx.
- The default root password is insecure. To change the password, see Setting the root password.
- Select .
- In Region & Language, configure your language settings.
-
Depending on your configuration, you may need to configure the ports.
- If you are using
Dell PowerEdge R440server, use ports em1 and em2. - If you have an
American Megatrendserver, yourenp9s0port is automatically set to communicate with the IFDR10 on a 10.0.1.x network.
CAUTION Do not reconfigure the network port to IFDR10.
-
If you have a
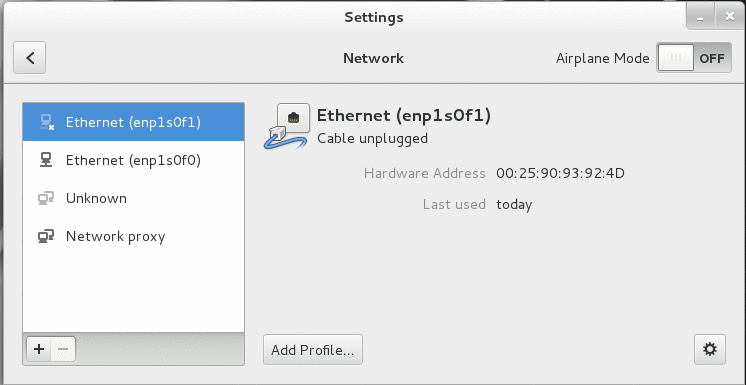
SuperMicroserver, your network settings for IFDR10 are not pre-initialized. The IFDR10 10.0.1.x network is usually configured on theenp9s0,enp1s0f1, oreth1ports but is not limited to these ports.This example uses the
enp1s0f1port.
-
Select .
-
Select the Identity tab.
In MTU, type 8192.
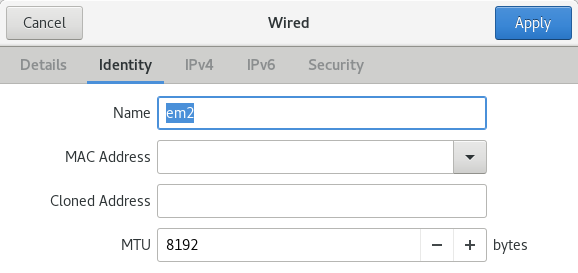
-
Select the Details tab.
Select Connect automatically and Make available to other users.
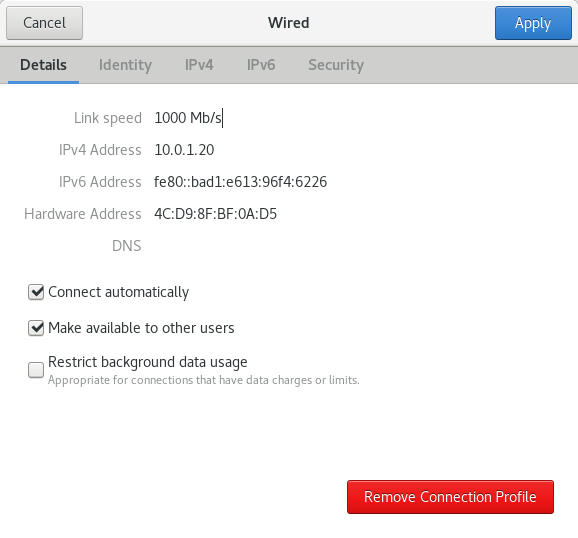
-
In the right pane, select IPv4.
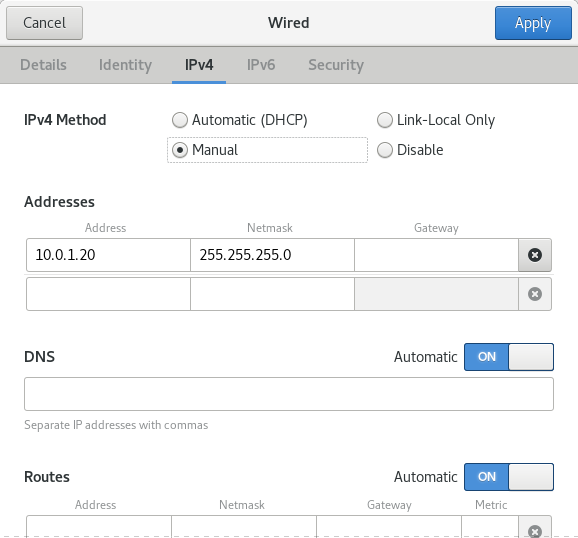
Change Addressing to Manual.
In the Address, Netmask, and Gateway fields, type enter the test shown in the figure.
Select Apply.
- If you are using