
Booting the system for manual installation
You must configure the system to boot from the media device that you have created.
The instructions in this section are for the Vaisala-provided server. If you are using a different system, consult your systems manual for instructions.
- Power up the system by pressing the power button on the server.
- Insert the USB drive into the USB port. If you are using the USB port for the first time, this also enables the port.
-
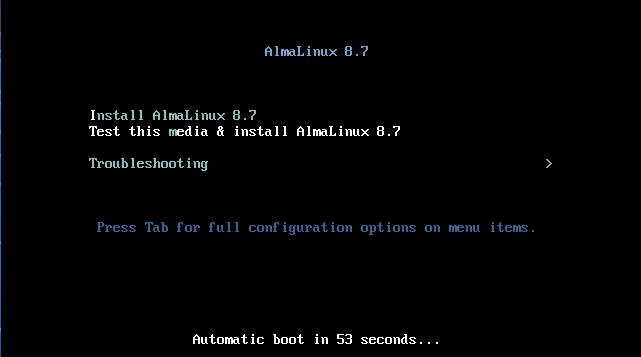
In the AlmaLinux 8.7 window, select Test this media & install AlmaLinux
8.7, and press ENTER.
-
Select a language.
(This instruction assumes that English (United States) is selected.)
- Select Continue.
- Select the keyboard icon to select the keyboard type (default is English).
- Select Language Support to select the language.
-
Select Time & Date to set up the time and date.
-
Region: Etc
-
City: Coordinated Universal Time
-
-
Select USER CREATION.
The User creation window opens.
-
Select Root Password to set up the root password.
For details, see Setting the root password.
- For Installation Source, select the default value (Local media).
- Select Software Selection (Server with GUI), and for additional software, select Development Tools.
- Click on Installation Destination
- Select local Standard Disks, and check the Custom button.
- Select Done.
-
Select LVM for the partition scheme from the drop-down
menu.
Select the + icon to add a partition. For more information about the partitioning, see Partitioning the destination disk.