Configuring the system and network

  1. In the Installation summary window, select Network & Host Name.
  2. Enter the host name in the Host name text box in the lower left corner.
    1. Select the network device you wish to configure listed in the panel on the left hand side. The selected device is highlighted.
    2. In some interfaces, to enable the network interface, select the blank button next to OFF in the upper right-hand corner.

      If the button exists, slide the button to the ON position.

    3. Select Configure at the bottom right-hand corner to display the Editing window.
  3. Select the General tab to set the connectivity options.
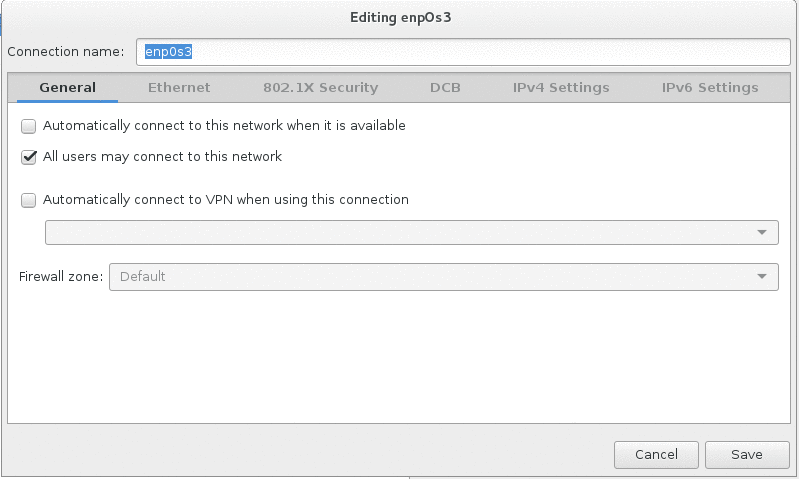
    1. Select Automatically connect to this network when it is available.
    2. Select All users may connect to this network.
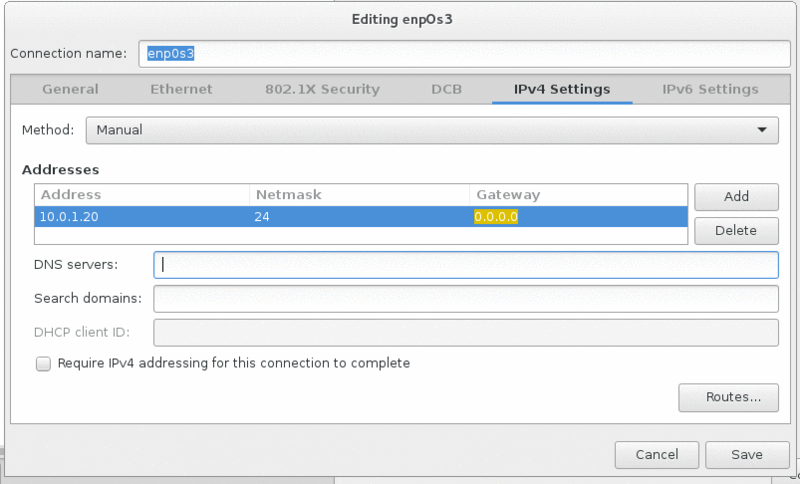
  4. Select the IPv4 Settings tab.
    1. In the Method drop-down menu, select Manual.
    2. Select Add.
    3. Enter the IP address, netmask, and gateway in the text entry boxes under the headers.
    4. If configuring your eth0 interface, type your DNS server address in the DNS server field.

      If configuring your eth1 interface, leave this blank.

    5. If configuring your eth0 interface, type your domain name in the Search domains field.

      If configuring your eth1 interface, leave this blank.

    6. Check the Require IPv4 addressing for this connection box near the bottom of the page.
  5. Optional: If you are configuring the computer to run RDA software and connect to IFDR10, you need to configure Ethernet ports. See Configuring the system and network for RDA and IFDR10.
  6. Select Save in the lower right corner to finish network configuration.
  7. Select Done in the upper left corner of the Network and Host Name tab to return to the Installation summary window.