

Animation Tool
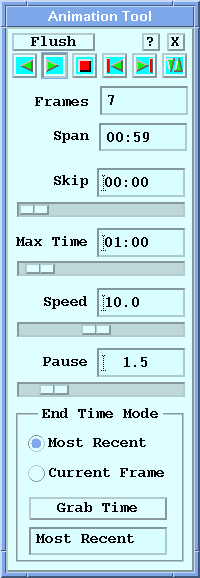
Animation is one of the best ways for forecasters to observe the motion, growth, and decay of radar echoes. In real time applications, many IRIS users leave a loop running constantly.
The Animation tool lets you control the animation sequence.
 |
You can also use the Slide Show tool to automate the display of different products from different times. See Slide Show Tool. |
 Loop Start and Stop
Use these buttons to play (reverse and forward play) and stop animations. They are also available in the Legend.
| To use the SPACE BAR to stop a loop or start it in the forward play direction, place the cursor in the image area of the loop. |
 | When a loop starts, the Site filter automatically matches the loop so that only images from the site (for which the loop was started) are displayed. |
Loop Loading and Status
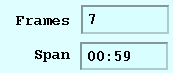
When a loop loads, it shows how many frames have been loaded and how many total frames are available (29/30 in the example). The loop starts playing immediately, while it loads. You do not have to wait for the loop to be fully loaded before it is playing at loop speed.
After the loading is complete, a number, 30 in the example, indicates the number of frames in the loop. The time span shown is the actual span of the frames in the loop, not the requested Max Time.
Factors that determine the number of frames in a loop include:
-
Device Movie Length and default window size configured in .
If your window size is the same as the default size, this is the maximum number of frames shown.
If you set your window size to be smaller than the default size, then you are shown more frames, since the same amount of memory is allocated for movies.
If you set your window size to be larger than the default, you get fewer frames.
- Max Time determines the maximum possible span of the movie. This limits the number of frames.
- The number of frames available on disk. To see this, check the Time icon.
 Flush the Loop Buffer
The loops are "sticky". The frames are kept in a loop buffer so the loop does not have to reload if it stops and restarts. This is convenient when you are working with long loops.
If you make a change to the window such as the color scale or the Display Options, the buffer automatically "flushes" and the loop reloads your changes.
If your loop must be flushed and reloaded or your loop buffer becomes corrupted, use the Flush button to refresh the buffer. The loop reloads the next time it starts.
 Previous/Next
Single step forward and back through the loop. This is similar to using the Time Slider or using the left/right arrow keys on the keyboard (with your cursor in the image area).
 Toggle
Swaps between the current image and the previous image on the display, regardless of the image type or time. Sometimes this is useful for comparing 2 different products (for example, TOPS and VIL).
Display both products, then use the Toggle icon to alternately display each one.
| It is convenient that when the cursor is used, the position is displayed correctly in the 2 toggle frames, even if their scales are radically different. |
 Skip Time
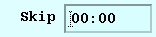
If you want to loop a long time series of
data, for example, say 24 hours, you must usually necessary skip some frames so that you can
display the entire 24-hour span without exceeding your Device Movie Length
for the maximum number of frames.
Specify the time skip in HH:MM. For example, specify 01:00 (one hour), for
a 24 hour movie to have 24 frames.
The skipping algorithm attempts to show the frames that are exactly on or as close as possible to intervals of the skip time. In the case of a one hour skip time, the frames would be on or as close as possible to just after the hour.
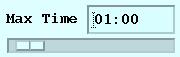 Max Time
This is the maximum allowed time span.
You may not be able to achieve this since there may be insufficient frames on the disk or
you may be limited by the Device Movie Length frame/memory limit configured
in . The actual achieved time span is displayed in the
Span field.
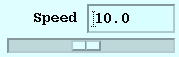 Speed
Speed
This is the requested speed in frames per second. Faster is to the right, slower is to the left.
Achieving the speed depends on the speed of your CPU, the amount of memory that you have, and the size of image that you are looping.
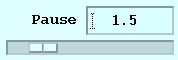 Pause
Pause
This is the pause in seconds between successive loops.
In addition to marking the end of a loop, Pause gives the computer a chance to rest and do other things. For example, setting a very short pause of 0.0 sec runs the loop continuously, which can cause other tasks such as loading the loop to take longer. If your computer seems too busy, lengthen the pause. The 1.5 second default value is a good compromise.
 | Caution
High-speed loops of large images place a high demand on CPU and memory. By running several large format loops at high speed with no pause, you can use near 100 % of your CPU and memory depending on your system hardware configuration. Consider the IRIS tasks on your system such as product generation and data acquisition from the radar. The default values for Speed and Pause are reasonable starting points. |
Setting the Loop End Time
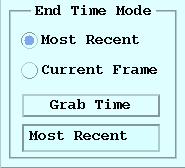
Usually the last frame in the loop is set to be the Most Recent picture. In this case, new data are added automatically to the loop. This allows you to leave a loop running on a display so that you can always see the current situation. Note that when the loop end time is set to most recent (the default), the Mode indicator at the top shows:
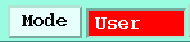
The green background behind User indicates that the display automatically updates with new images. If the loop does not reflect the most recent data, the Mode shows a red background color.
The Current Frame and Grab Time options allow you to fix the end time for occasions when you want to create loops that do not end with the most recent image, for example, for analysis of archive data from last year.
-
Current Frame mode sets the loop end time to be the time of the image that is currently in the window when the loop is started. Browse through the images until you decide what frame should be the last frame and then start the loop. The loop ends on the frame that you selected.
As you start and stop loops in this mode, the end time is not fixed, it is readjusted every time that the loop is restarted.
-
Grab Time allows you to select a specific time for the end of the loop. Browse through the images until you find the image that you want to be the last frame and select Grab Time to latch this time. Even if you change product types, any loops started use this as the end time.
|
Current Frame and Grab Time the loops do not update automatically. Avoid leaving the displays in these modes since it could confuse other users. |