

Display Options Tool - IRIS Product Output
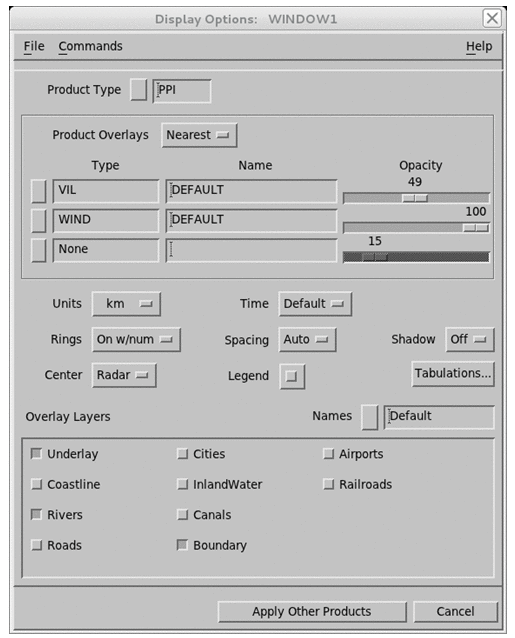
The Display Options tool allows you to select display components such as geographic overlays, range rings, drop shadows, and even the overlay of multiple products, warning centroids, and echo tracks, along with adjusting the product overlay opacity. Select the icon to display the tool.
Saving Quick Look Window Display Options
Because there are many display options in this menu that can affect the appearance of a window, IRIS provides an easy way for you to save and recall configurations that you have made. Select File to show the following choices:
-
Save
Saves the menu current settings FOR THIS WINDOW ONLY.
When you save a configuration you are not affecting any other window, any other user, or the operation of IRIS. This means that, with the permission of your system manager, you can make your own personal settings for a window without effecting anyone else.
-
Load
Restores the current saved settings. This is convenient if you want to make a temporary change.
-
Print
Makes a hardcopy of the menu to the default system printer.
Selecting the Product Type
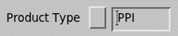
When you first enter the Display Options tool the product type is inserted automatically in this field.
To choose a different product type, select the button.
To apply changes to this product type or all product types, use the apply options on the bottom of the window.
 | If you display a CAPPI and change the product type field shown above to, for example, PPI, the changes are not applied are in the displayed product (the CAPPI) until you select Apply All. |
Adding Product Overlays
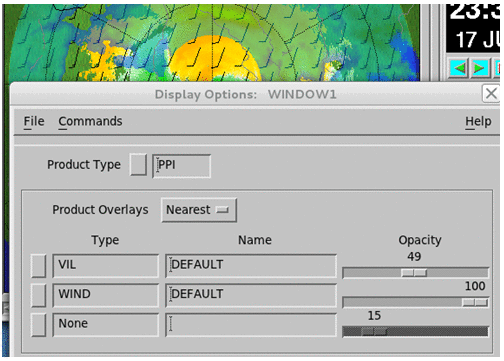
The section lets you combine different products. Almost any kind of product can be overlaid on any other product.
In the example above, an interactive TRACK product has been overlaid on a PPI. Typical applications for this are:
- WARN product overlays
- WIND or NDOP (multiple Doppler) wind barb overlays
- TRACK
- SLINE (shear line)
Multiple products can be overlaid in this manner. For example, WIND and SLINE displayed together show the wind vectors associated with a shear line.
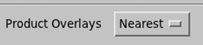
Product overlays have time alignment options:
-
Nearest
The overlay product is the nearest in time to the base product.
-
Live
The overlay product is the most recent time.
It is also possible to combine 2 different types of image products. The example above shows VIL product with TOPS displayed underneath.
| When combining 2 image products, it is important to select contrasting color scales to be able to separate the data. In this example a gray scale was used for the TOPS. The drop shadows on the VIL are helpful. |
| If your IRIS system supports satellite IMAGE product ingest, then this is how you combine the satellite display with radar data. |
Range Units

This allows you to select range units for output displays. Choices are: scientific (kilometers) or navigational (nautical miles for horizontal distances and kilofeet for altitudes).
Time
This allows you to display UTC or the local
time on the legend. The time has a Z suffix if it is UTC.
Select Default to let the Setup question to control this value.
Range Rings
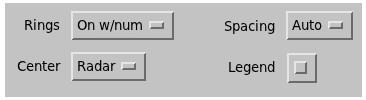
You can add range rings, adjust the spacing of the range rings and center the rings on predefined points (for example, the radar or perhaps an airport. Select Rings to show the following:
-
None
No range rings are displayed.
-
On
Range rings are displayed but not numbered.
-
On W/Num
Range rings are displayed with range numbers.
-
Lat/Lon
A latitude/longitude grid is displayed. In addition, the display legend for each product shows the maximum product range.
Ring spacing is selected by the button to the right (Auto in the example).
Depending on the unit selection, the spacings are displayed as km or nautical miles.
The Center button allows you to select the center of the range rings from a list of pre-defined home points. The home points are defined in the Cursor or Track tool.
| You must have operator privilege to define home points in the Cursor or Track tools. Operator privilege for a Quick Look Window is set in the File tool by entering a password that is set in . |
Legend

Enable this option to put a legend in the actual image. Most users leave this off since the Quick Look Window has a built-in legend.
If you elect to put a legend in the display, we recommend the following to optimize the window size:
- Use View to select a standard rectangular size (for example, 880 × 720).
- Use the Legend icon
 to toggle the Quick Look
Window legend off.
to toggle the Quick Look
Window legend off.
Shadow
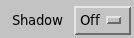
Enable Shadow to choose the kind of drop shadows displayed with products.
A drop shadow shades weather features, making them stand out against the background as if they were clouds shaded by the sun. You can turn drop shadows off, or choose from three shadow depths.
Tabulations

IRIS overlays can contain abbreviations or numbers for important places, such as airports, city centers, and similar.
Select Tabulations to show a menu with the full names for the abbreviations on the screen.
Overlay Layers
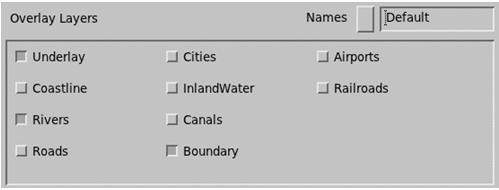
Geographic overlays show coastlines, roads, political boundaries and similar. See Overlay utility in IRIS and RDA Utilities Guide (M212925EN).
Select Overlay Layers to expand the Display Options menu to include the menu shown above. IRIS overlays are usually constructed in multiple layers so that users can turn on/off the layers.
After selecting some layers, select Apply to see your changes take effect.
"Virtual Overlays" are names given to different combinations of layers. To select a pre-defined virtual overlay, select the button next to the overlay name and select a new name from the list.
Operators can create "virtual overlay names." If you have operator privilege, enter your password through the Quick Look Window main File tool. Once you have privilege in the window:
- Select the button next to the overlay name and select New.
- Type the new name in the prompt.
- Select the layers that you want.
- To save your result, select .
When you save, the virtual overlay name is shared among all IRIS windows, printers, and so on.
Apply Other Products, Cancel

After you make changes to the Display Options, the Apply Other Products applies the changes.
Any changes that are applied affect only the window that you are in. You do not have to worry about affecting other windows (and vice versa).
Apply Other Products applies the changes to all product types, again for your window only. Cancel exits the menu without making any changes.
| Press any button to apply your changes to the current product type for your window only. |