

Creating a Cross-Section
 |
Cross-sections are generated by interpolating original polar data. To make a cross-section, you must have ingest files from the signal processor or from RAW data on your system. If the window is exported from another system to your screen, that system must have the ingest files. |
-
Select an appropriate "base" product.
You cannot use products such as RAIN1 and RAINN for a cross-section since they do not represent a specific time.
- Select the XSECT tool (the icon with the cutting knife).
- Use the mouse to position the endpoints of the cross-section line.
-
Configure the cross-section:
-
In Height, specify the height of the cross-section in km to
the nearest 0.1 km (100 m) (328 ft 1 in).

-
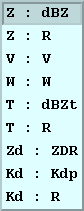
In Data, select the data types from the list.
The left variable represents the input data type, the right variable represents what is displayed.
The following example shows a polarization diversity example.

-
In Size, select a large or a small size window.
A small size is usually better since it takes up less screen area and generates more quickly.
-
In Smoother, select the horizontal and vertical smoother
length scale in km.

-
In Height, specify the height of the cross-section in km to
the nearest 0.1 km (100 m) (328 ft 1 in).
-
To cross-section, select the XSECT icon.
-
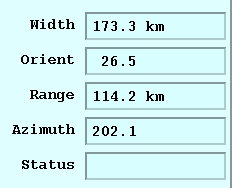
Monitor the cross-section line configuration progress in the
Status field at the bottom of the tool.
-
Range and Azimuth refer to the center point of the line.
-
Status shows the progress: Setup, Running, and Done.
If the ingest data for the requested data time (that is, the time of the base product) are not on disk, the status shows Error and a message informs you the ingest files were unavailable. In this case, browse forward in time and try again, or check the Ingest Summary Menu to see what data are available.
-