

Creating and Editing a Track
-
To start a new track:
-
In Name, type the name of your TRACK
product.
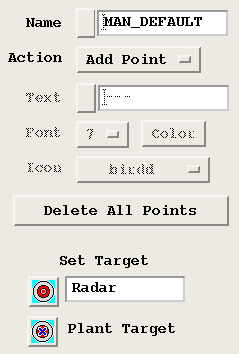
The Track Name field shows the name of a manual TRACK product.
The names are always preceded by
MAN_to indicate that these are manual tracks rather than automatic TRACK products created by IRIS.-
To select an existing track name, select the button next to the name field and select from the list of pre-defined names. There is always a track with the name
MAN_DEFAULT. -
To create a new name, replace the text in the name field. IRIS automatically adds the MAN_ prefix and converts the name to upper case.
-
To delete a name, select the name you want to delete and select Delete. The name is deleted from the list and the
MAN_DEFAULTis inserted as the active track.
-
-
In Track Data, define your track.
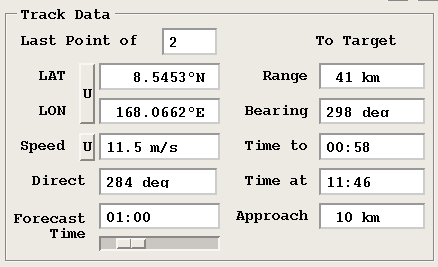
The center column of the Track tool shows information about the track you are constructing.
- Last Point of <N>
Nshows the number of track, annotation and icon points that have been defined.- LAT/LON
-
Shows the latitude and longitude of the last track point, that is, the most recent data time.
Select U to toggle the units between decimal degrees and decimal minutes.
- Speed and Direction
-
Shows the speed and direction of the weather feature as computed from the two most recent track points.
Select U to select common units.
- Forecast Time
- Allows you to set the time of the forecast.
-
To add points to a new track:

To avoid crowding the track points, skip a few images. You do not need a point for every image. In track mode, use the mouse to add track points and the left/right arrow keys for browsing. -
To delete a track point:
- Select .
- Select the track point that you want to remove.
Keep pressing the mouse button to highlight the point to be deleted. This is helpful when you want to delete a track point that is close to other track points.