

RHI: Range Height Indicator
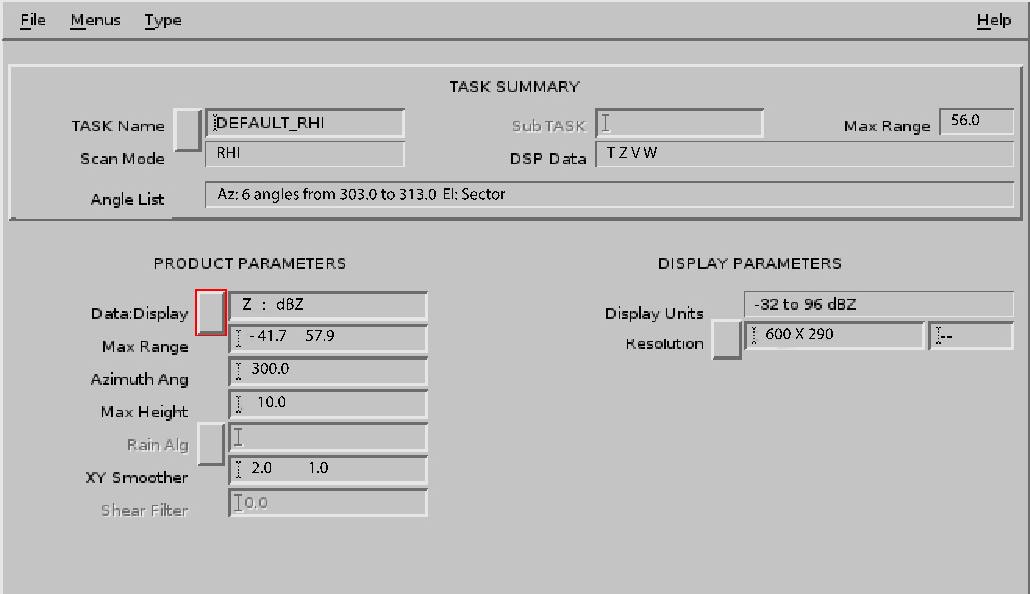
RHI is a full screen image showing the detailed cross-sectional structure of a storm, used for identifying severe storms, hail and bright band.
In general, you schedule the associated RHI task through a region of interest.
During RHI scanning, the antenna azimuth is fixed and the elevation is swept, typically from near 0 ... 90° to create a vertical cross-section effect.
If your antenna permits, it is often useful to make an over-the-top RHI task (elevations for example -2 ... 182). This gives a picture covering 2 elevations at the opposite sides of the antenna. Negative elevations are most useful in RHI if you select the azimuth to the direction of least beam blocking of the radar horizon.
- Select .
-
In Data : Display, select any data type defined in your
RHI task.
Also, if you measure V you can select SHEAR or output data type for radial shear. Radial shear is the difference between the velocity of successive bins in range.

SHEAR is allowed as an output data type to the RHI, but not to other similar products like PPI. -
In Max Range, enter up to 2 values in format of
xx.xkilometers.If you enter only one value, the first one is assumed to be 0.
The first limit is the beginning of your display.
Zero means the image starts from the radar site.
If you enter negative values, data is picked from another azimuth on the other side of the radar site in the same task, or if your task is scanning over-the-top.
You can also enter positive values, especially if you do not use high elevations and you want to avoid the flat corner of a triangular-shaped image.
-
In Azimuth Angle, specify an azimuth angle:
If you do not know this value in advance, IRIS selects the closest angle at run time, so you are always assured of getting a display.
If the associated task has only one azimuth angle sweep, that angle is used for the RHI product.
If you enter * to the field, the product is made for every azimuth in the associated task.
-
In Max Height, XZ Smoother, and
Range filter, specify the Max Height field
in
XX.Xkm.Because you specify both the maximum range and height, you can make an RHI at any horizontal-to-vertical aspect ratio.
Note that the final display is from 0 to the Max Height above the reference height.
The radar is located on the left edge, above the corner if the radar is above the reference. Negative elevation angles are included in that case. Rays are inserted straight, and the grid of constant height lines is curved to show earth curvature.
You can type the X-Z (height) Smoother values in km.
If you have SHEAR as an output data type, it is somewhat noisy, and must be smoothed with a range filter. This number is unused for data types other than SHEAR.
-
In Resolution, select Low (288 × 136),
Medium (600 × 290), High (840 × 530), or
XHigh (1060 × 750) resolution or type a resolution in the field.
RHI products look best with a rectangular resolution.